Python has become one of the most popular programming languages due to its simplicity, versatility, and extensive libraries and frameworks. In this blog post, we’ll guide you through the process of downloading and installing Python, explain how to set up a virtual environment, introduce you to some popular Integrated Development Environments (IDEs), and show you how to install your first Python package.
Agenda
- Install Python.
- Create a Python virtual environment to use as you code along for the Analytical Ascent: Learning Python series.
- Install a Python package to your new virtual environment.
Download and Install Python
Before you can start coding in Python, you need to install it on your computer. Follow these steps:
Windows
- Download the Installer:
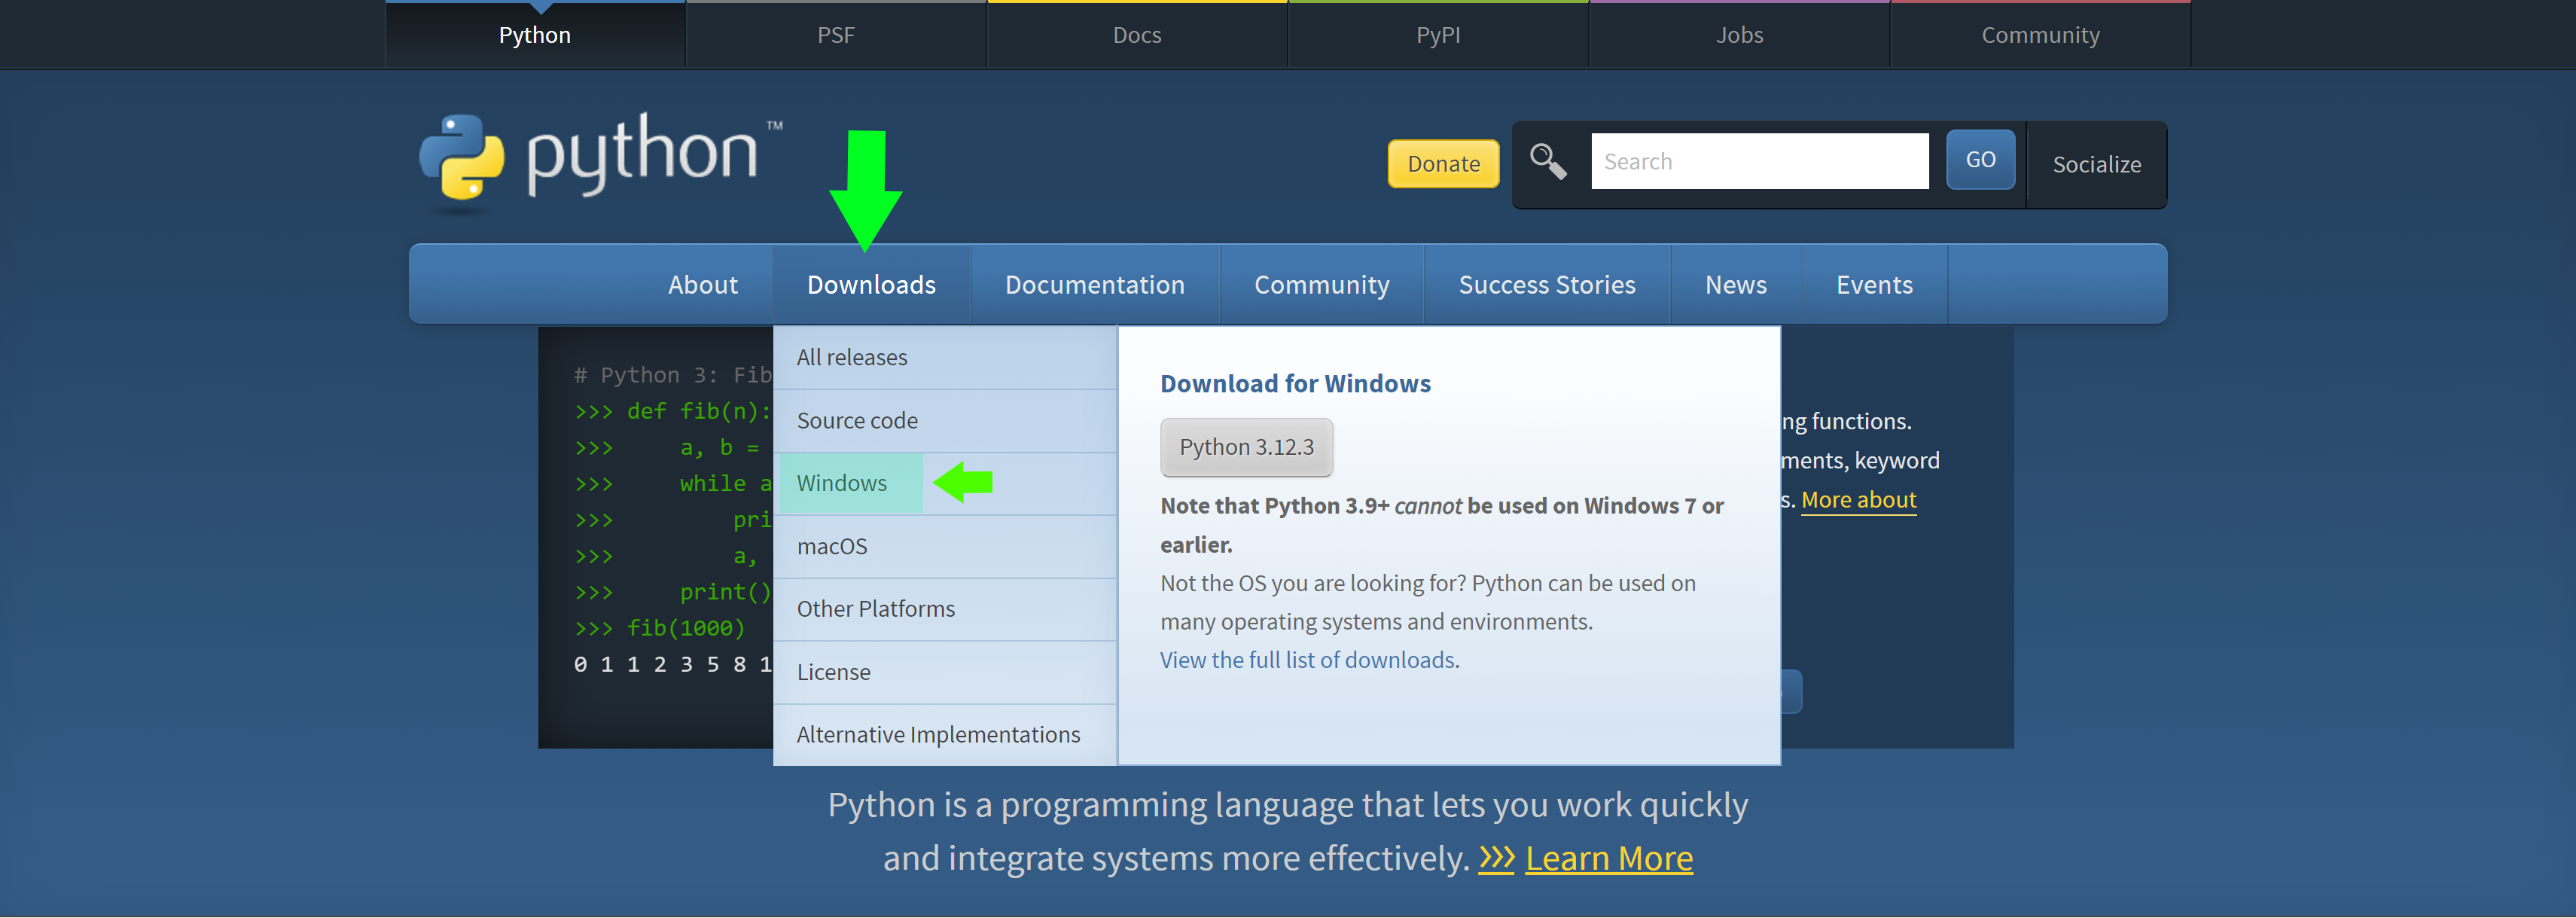
- Visit the official Python website at python.org
- Navigate to the Downloads section and click on the Python version suitable for your system

- Run the Installer:
- Locate the downloaded installer file and run it.
- Ensure you check the box that says “Add Python to PATH.” This step is crucial for running Python from the command line.
- Click “Install Now” and follow the prompts to complete the installation.
macOS
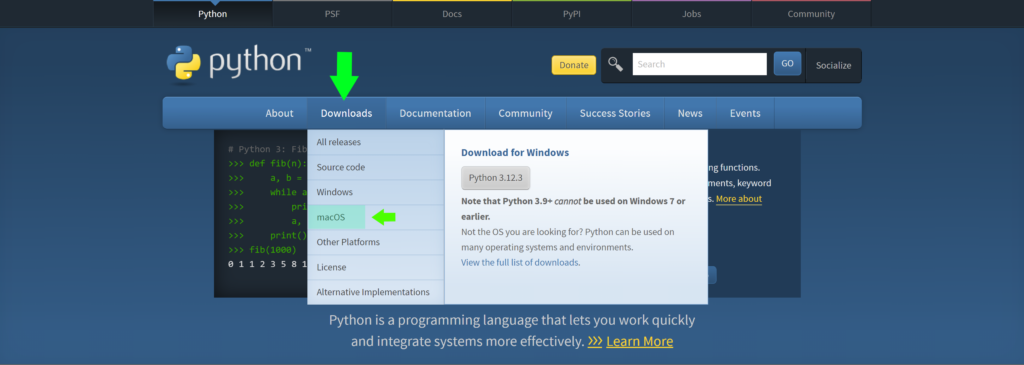
- Download the Installer:
- Go to python.org and download the macOS installer.

- Run the Installer:
- Open the downloaded ‘.pkg’ file and follow the installation prompts.
- Ensure Python is added to you PATH by opening a terminal and typing ‘python –version’ to verify the installation.
Linux
- Use the Package Manager:
- Use the package manager specific to your distribution. For example, on Ubuntu, you would use:
sudo apt update
sudo apt install python- Verify Installation:
- Check the installation by running:
python --versionSetting Up a Virtual Environment
A virtual environment is a self-contained directory that contains a Python installation for a particular project, along with all the necessary packages. This ensures that dependencies are isolated and do not interfere with other projects.
Imagine you had three different projects that you were maintaining and each project was created at different times. Perhaps the versions of various Python packages that you used changed. Also, each project might have required a different combination of Python packages.
Virtual environments help developers stay organized and reduce unnecessary bloat in their projects. When you need to work on the project that was created using the installations associated with a given environment, you would first activate that environment in a terminal to ensure you are working with the Python and package installation combination that will work for that project.

Creating a Virtual Environment
- Create a directory where you would like to store your python environments.
- For example, I will create a new folder on my Windows desktop named “py_environments”.
- Open a Terminal (or Command Prompt on Windows).
- Tip for Windows users: you can open the folder you created in step 1, type “cmd” into the address bar, and press enter to open a command prompt window directly from that directory. If you do this, you can skip step 3.
- Navigate to the directory you created in step 1 (for me, that is C:\Users\willi\Desktop\py_environments).
cd /desired/path/to/environment/folder- Create the virtual environment.
python3 -m venv env_nameHere, ‘env_name’ is the name of the virtual environment directory.
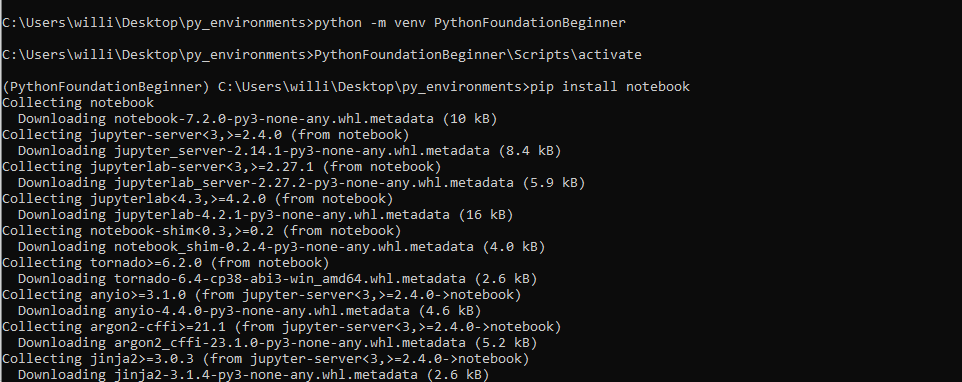
You can see below that I went through the steps (using Windows command prompt) of creating a PythonFoundationBeginner virtual environment to my chosen directory and then I activated that environment. You can see that the environment has been activated by the “(PythonFoundationBeginner)” prefix. To deactivate an environment, you can simply type “deactivate” at this point and press enter; however, let’s keep it activated for now.
After creating the virtual environment you should also now see a new directory inside of the directory where you created your environment. That directory will be named whatever you chose your environment name to be.


In the next section we’ll discuss Integrated Development Environments (IDEs) and install our first Python package inside of the environment we have created.
Introduction to IDEs: Jupyter Notebook, VS Code, PyCharm
Choosing the right Integrated Development Environment (IDE) can significantly enhance your coding productivity. We won’t cover every available IDE in this post. I encourage you to explore those other options, and maybe try them out, to find what works best for you. The three IDEs that I am most familiar with are:
Jupyter Notebook | https://jupyter.org/
- Features:
- Interactive Code Execution: Allows for the execution of code in individual cells, providing immediate feedback.
- Rich Text Support: Supports Markdown for creating rich text annotations alongside code.
- Data Visualization: Facilitates inline visualization with libraries like Matplotlib, Seaborn, and Plotly.
- Use Cases:
- Data Exploration and Analysis: Jupyter Notebook is ideal for data scientists and researchers who need to experiment with data and visualize results interactively.
- Educational purposes: Frequently used for teaching and learning due to its ability to combine code, text, and visualizations in a single document.
Visual Studio (VS) Code | https://code.visualstudio.com/
- Features:
- Code Editor: Advanced text editor with syntax highlighting, code completion, and linting.
- Debugger: Integrated debugging tools to set breakpoints, step through code, and inspect variables.
- Integrated Terminal: The integrated terminal allows developers to run shell commands directly within the IDE, streamlining the workflow. This is a convenient feature for developers who frequently use command-line tools and scripts.
- Use Cases:
- Cross-Platform Development: VS Code supports a wide range of languages and frameworks out of the box and through extensions, making it ideal for multi-language projects (e.g., a project involving Python, JavaScript, and HTML/CSS).
- Lightweight and Fast Setup: VS Code is lightweight and easy to install, with a fast setup process. It’s suitable for quick coding tasks and temporary setups and is extremely useful for developers in need of a quick setup for coding on different machines or environments.
PyCharm | https://www.jetbrains.com/pycharm/
- Features:
- Code Editor: Advanced text editor with syntax highlighting, code completion, and linting.
- Advanced debugging: PyCharm is tailored to be ideal for thorough testing and debugging of Python code having integrated testing frameworks along with the traditional debugging features like breakpoints, variable evaluation, and the ability to step through code.
- Code Quality and Refactoring: Code quality tools include PEP 8 checks, code inspections, and refactoring tools.
- Use Cases:
- Strong candidate to be a main IDE for developers who only plan to code in Python.
- PyCharm is great for professional Python development of large-scale projects.
Popular IDEs can do most, if not everything, that another can do. There are some unique features here and there; however, the ultimate decision regarding which IDE to use falls mostly to the developer’s personal preference or, in some cases, organizational constraints (for example, you may work at a company that only provides access to VS Code).
Here are some additional IDEs to explore:
- Spyder | https://www.spyder-ide.org/
- Atom | https://atom-editor.cc/
- Komodo IDE | https://www.activestate.com/products/komodo-ide/
- Wing | https://wingware.com/.
Installing Jupyter Notebook
Jupyter Notebook is useful for educational purposes and considering this blog series is built around learning Python, I thought it would be a good starting point to use this tool.
To install Jupyter Notebook:
- Open a terminal or command prompt.
- Activate your virtual environment.
- Type:
pip install notebook
The pip command connects to the Python Package Index, commonly referred to as PyPI (pronounced pie-pie). PyPI is an online repository where you can find and download thousands of Python packages and libraries to help you build your projects. We’ll use this command a number of times during this blog series as we start to work with additional packages.
Conclusion
In this post we’ve gone through the necessary steps to install Python, create a virtual environment, and install a python package. In the next post we’ll go over some key resources that will help you on your Python journey before jumping in to start coding. Farewell, for now!
